

Welcome back to PC BOSS ONLINE. In today’s article I am going to show you how to remove the dual-boot menu option on windows 10, 8, 7, 8.1, Vista and XP.
If you recently installed a new version of Windows 10 next to a previous one, your computer will show a dual-boot menu in the Windows Boot Manager Screen from where you can choose which one you want to boot into.
Without wasting much time, let’s go straight into the steps used to disable windows 10 multiple boot options.
We are going to use the Windows msconfig utility tool to do remove the dual boot menu. Follow steps below.
How disable dual boot option in Windows 10
- Click on the start menu button
- Type “msconfig” in the search box.

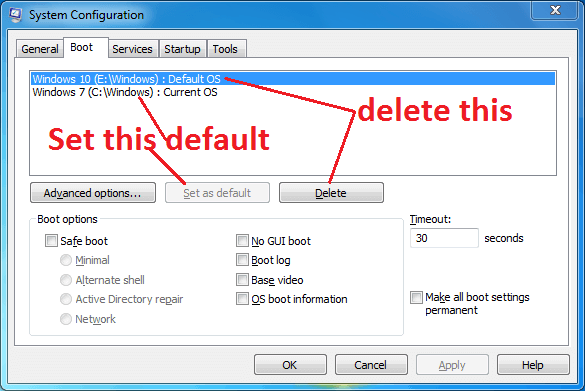
- Click on Boot
- Select which windows version you would like to boot into.
- Click on set as Default.
- Delete the earlier version of windows by selecting it and then clicking Delete.
- Click Apply
- Click OK
- Restart your computer
You’ve successfully removed the dual boot option from Windows 10. This will stop Windows from displaying a dual boot menu upon booting.
Check our previous post on HOW TO ACTIVATE WINDOWS 10.
Useful Information.
Note that disabling the dual or multiple boot option in Windows 10 does not delete the actual Windows files from your hard drive.
To entirely delete the second operating system, follow the tutorial below.
HOW TO DELETE previous operating system from your hard drive with ease.
The above method applies to all versions of windows operating system. However, you can leave a comment below if you encounter any problem.
Thanks for reading. Support us by sharing to family and friends.