WordPress is a Content Management System (CMS) use for creating blogs and normal websites.
It’s drag and drop features allows users with no technical knowledge in web development build and deploy stunning websites in no time.

It comes with free and commercial themes and plugins which adds more functionality and design to websites.
According to http://trends.builtwith.com, WordPress takes about 50% of the CMS market share. This makes WordPress a very good option to consider in web design.
In this post I am going to teach you how to install WordPress locally on any Windows PC.
The steps below will take you through the installation process. It is assumed that you have basic knowledge in web stuffs and computing.
Requirements For Installing WordPress on Windows
- WAMP SERVER (a local APACHE server to host WordPress locally) download from HERE
- WORDPRESS, download from HERE
OTHER POSTS:
How to recover a permanently deleted wordpress post.
The Installation Process.
The WordPress local installation is divided into the following stages
- Wamp server Installation
- Configuring WordPress
- Creating the database
- Finalizing the Installation.
Let’s begin the process.
Installing WAMP Server.
Wamp server is a local server that is installed on your PC. It serves as a suitable environment for the running of WordPress on your computer.
- Double click on the WAMP setup file and follow the installation process till complete
NB: during the installation process, you will be asked to choose preferred browser and text editor. You can click “No” to use the default settings
- Click on the desktop shortcut to open and start the server
Configuring the WordPress
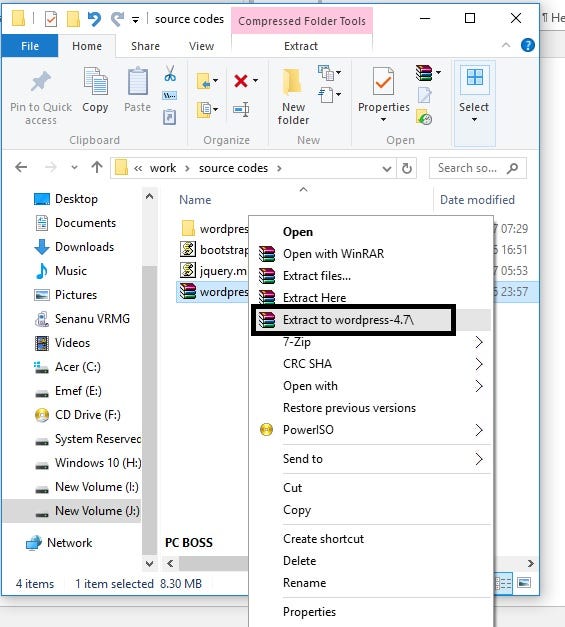
- Locate and extract the downloaded WordPress zip file
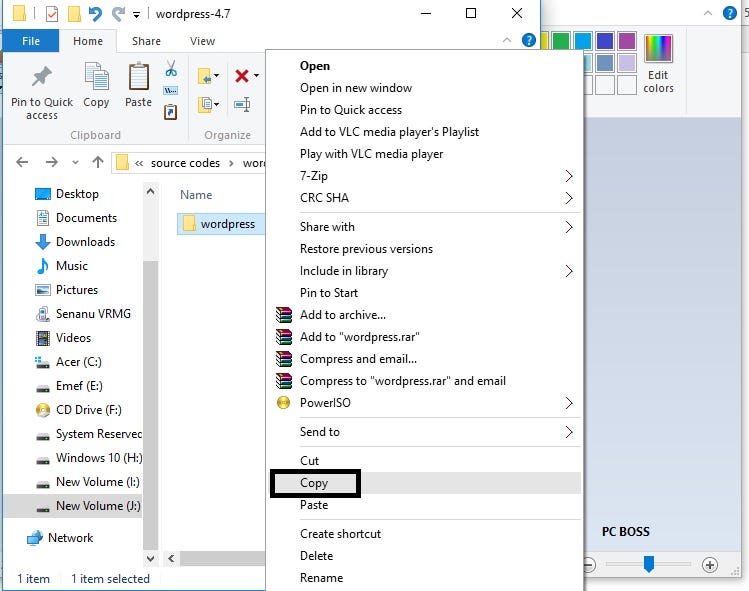
- Open the extracted folder and copy the WordPress folder inside it
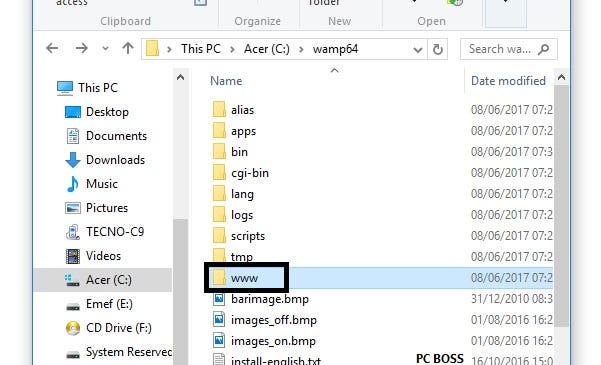
- Open Local Disk C
- Open the wamp64 folder

- Open the www folder and paste the WordPress folder there
Creating the database
- Open your browser
- Enter this URL a localhost/phpmyadmin and hit Enter
A page will appear asking for login credentials. Enter “root” as the username, leave password blank and click OK
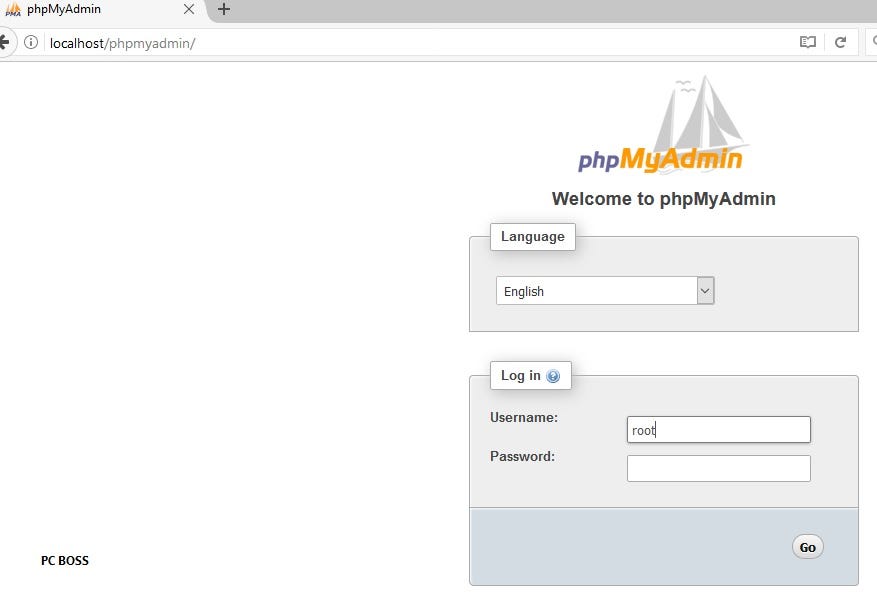
The “phpmyadmin” page will open
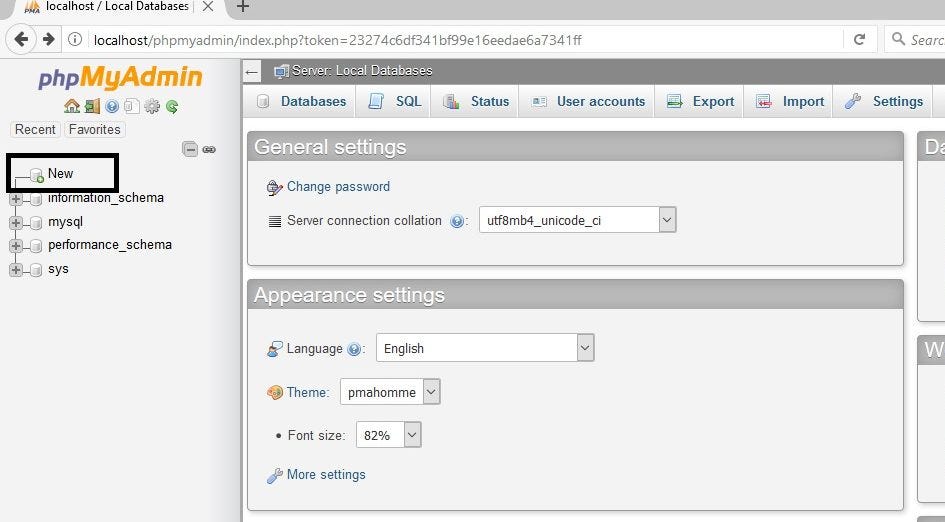
- Click on new to create new database
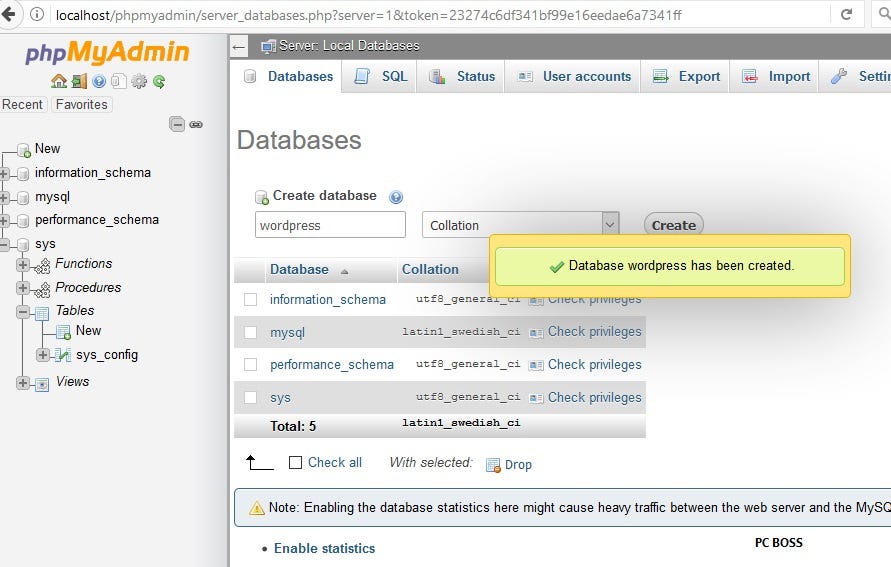
- Enter preferred database name and click create. Database has been successfully created.
Finalizing the installation
- Open a new tab and enter this URL, localhost/wordpress
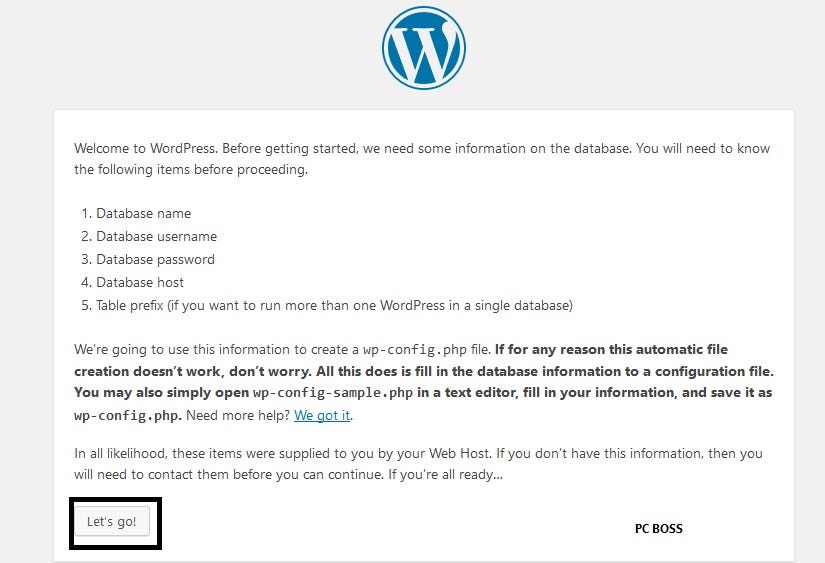
- Click the “Let’s go” button
- Enter the details of the database you created. Enter the Database name, username which is “root” and leave the password blank. Leave the Host and table prefix as it is

- Click on Submit. You’ve successfully configured WordPress to access your database
- Click on “Run” to install
- Enter your preferred blog details and continue to Login page
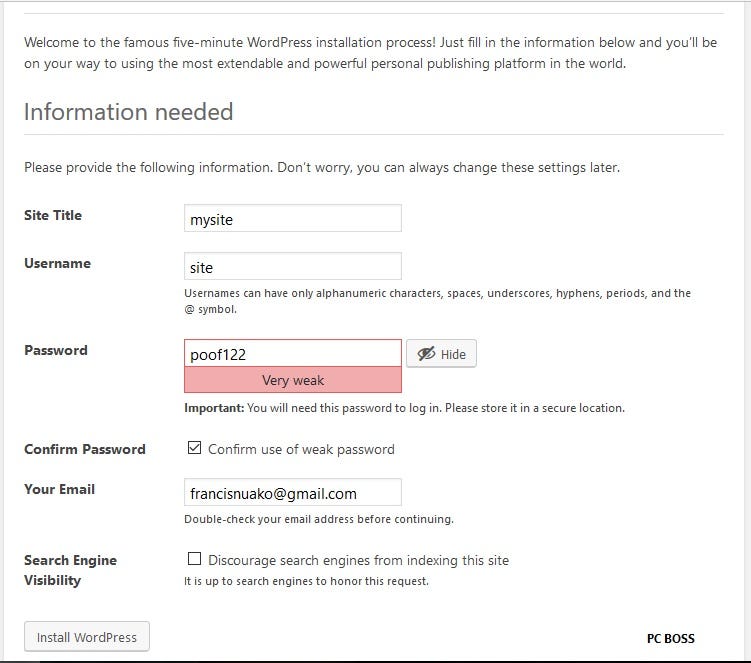
- Enter your login info
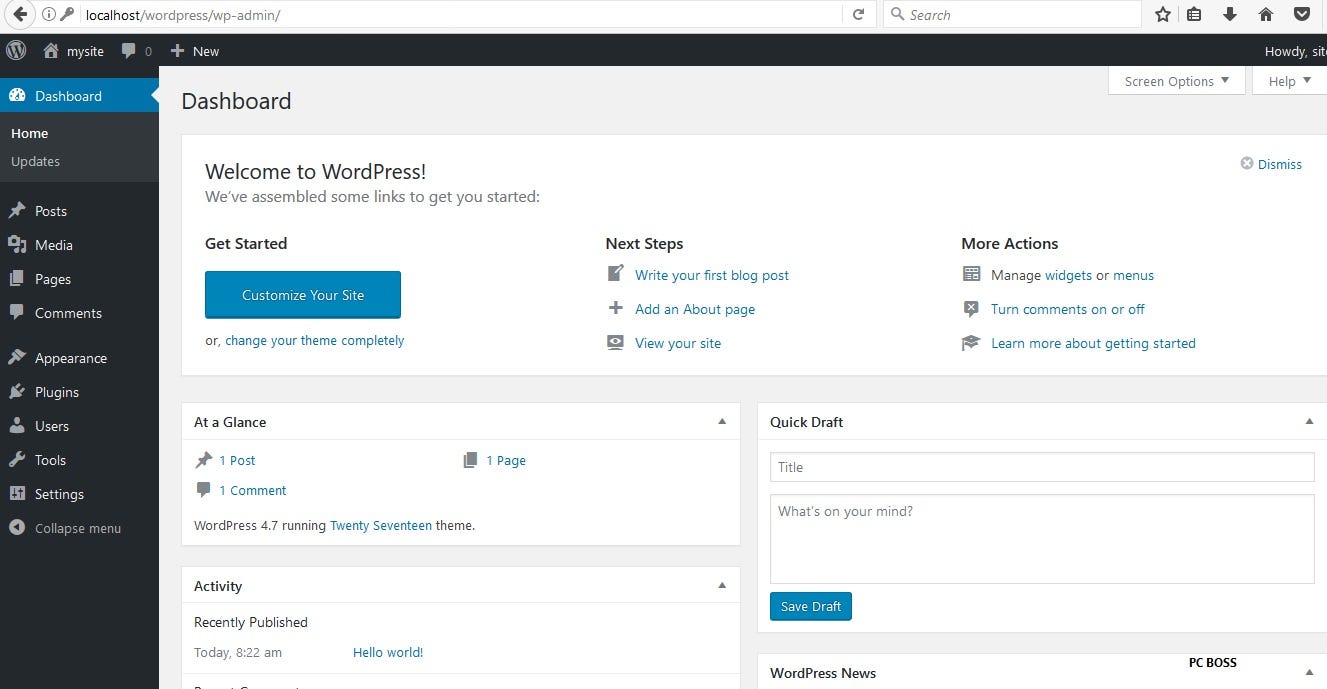
Everything is now setup
You can login to the admin dashboard panel anytime to start creating your website or blog using the link localhost/wordpress/wp-admin
Thanks for reading. I hope you have been satisfied. If you have any question leave them in the comment box below.
Do support us by sharing this article to family and friends. They also need to learn. Much love from the PC BOSS ONLINE TEAM.


great. I’v never used WordPress and I’v been wanting to try it out one of these days. this post is gonna get me started. thanks boss man
Thanks for the feedback. I do appreciate that.